
Hold my beer and watch me renovate this....part 2
- Brian Demo
- May 20, 2019
- 5 min read
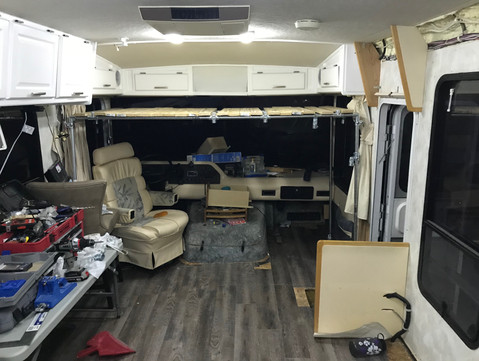
We had finally moved from demolition mode to rebuild time. We started out with the flooring. We had originally planned a lock style floor board type but after reading some reviews and lessons learned from other RVers, we realized that was a bad idea. It is after, a constant rolling earthquake as you go down the road. We decided to go with a vinyl glue type instead. It is scratch resistant, easy to put down, and simple to maintain. BEFORE you put down floors in an RV, you must make sure that you get up EVERY SPECK OF DIRT off the floor. If you don't it will show up as a nice pimple under your floor board. Not that we know of course, we have just heard of this happening.......you believe me right? I didn't think so. We found that issue, fixed it, and also added a primer to the floor as well to ensure that the boards stuck. One year later, they are all still holding thankfully and we have spares just in case we need to replace a few. The cutting and aligning was extremely simple and nearly painless. This was a huge boost in moral/happiness for us to see this because it really gave us the sense of progress.


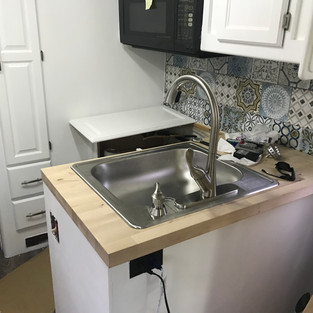
With the flooring installed, we decided on another thing to change. Our stove/oven combination was something that we deemed we wouldn't use. We didn't plan on using an oven at all really and in truth, the idea of the oven always freaked me out. Possible gas leaking, pilot light going out, and the dreaded we get blown up in our sleep because of it (which hasn't happened, or so I've been told/read about). So we decided to replace it and install just a cooktop style one. Walmart had the best price for the one we had decided on from other website reviews (namely Camping World but was almost $75 less than them) and would fit our gas line set up. Jennie had also found a "tile wallpaper" that she wanted to try out. It actually complimented the kitchen nicely. *UPDATE A YEAR LATER* it is still stuck on but our toaster oven (post coming about that later) was too close to it on several occasions. Um...it doesn't like that much heat FYI.


With the stove, sink, and counters completely out of the way, I could move onto the next fun task of installing the wall for the power outlet on the end of the counter. This proved to be more challenging than I had originally planned because as you can (kinda) see from the pictures, there are not a lot of solid wood pieces to drill into for security. I got creative in a few spots and added a back up support and used pocket holes when needed. I cut out hole for the power switch, and just left the outlet alone on the front side. This task also introduced me to RV electrical wiring & outlets. Odd system 2 (sometimes 3) copper wires that run directly to a jagged teeth style connection to energize them. Those teeth hold on quite well too for your information. More on that later when I show the change in outlets to USB plug style.


Speaking of pocket holes.....these are the two tools that I find myself using so much when i'm doing any build. The Craftsman drill was a great Christmas present. The heads change out for several other tools. Drill, impact drill, jig saw, circsaw, sander....so many uses. The other is the Kreg Jig system. In the picture, this is the pocket hole joint set up. I also have the cabinet making one that I am excited to one day finally use. They have a great product and I wouldn't have known about it if my friend "Coach" K hadn't gotten it first and explained the amazingness it brought. Thanks again K!

The kitchen sink and counters were the next monster to take down. We decided on utilizing butcher block that was already complete as it was a time saver and Lowes had a deal on it. What was not anticipated however was the weight of this monster. I was slightly shocked to say the least after I get that monster up there to start the plan. Thankfully, it all worked out after some minor technical issues (get the right blade on your saw before cutting this, you'll thank me later) and a couple of oops moments (no blood was spilt) it was installed. We opted for a residential faucet mostly for the looks and use of it. The original was just not going to be able to cut it, and I kinda broke it. The stove top arrived the next day and the process was repeated (sans issues). Unfortunately in the pictures you cannot see it, but on the left of the stove, I cut out knife holders through the butcher block. I didn't want a magnetic with the constant rocking and rolling and our drawer situation was not idea for this. Now the rest of the area under the stove was wide open to hold all our pots, pans, cutting boards, and anything else kitchen related for storage that we were missing before. One thing I didn't love that Rexhall did was waste a bunch of cabinet space under the sink. From the door to the wall you can put stuff in there, but it is in the dark dungeon of forgotten things so anything put in there will be likely forgotten. I was going to put a hole in and a door but decided against it. I was running out of time.


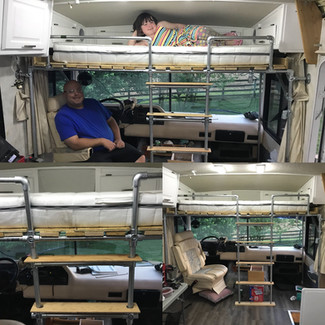
Figuring out a space for Abby was something that we had worried about from the start. Jennie found a blog of another full-time family that created a bed above the drivers area. It was a thing of beauty with the way the stained it and built it. Jennie reached out to them and they happily gave us some advice and information on how they did it. I'll admit, I felt like we were talking to celebrities when they emailed us back as they have been featured several times for their renovation and rig. So I followed what the said and made my adjustments for our rig. A whole lotta 3/4" steel, connectors, wood, and ingenuity was used to make this monster. One thing about me, I over engineer things. I always have when I'm working on a project that someone is going to use. This was no different. Pressure mounted it to the right & left sides so we didn't penetrate the skin, hard mounted for fore & aft motion to the cabinets above the driver, four fittings into the deck with thick screws, and extra lateral support beams to reduce any shaking. If we ever rolled over in the RV (God, please don't let that happen) I had created my very own roll cage. Oh, and Abby's comfortable bed too.


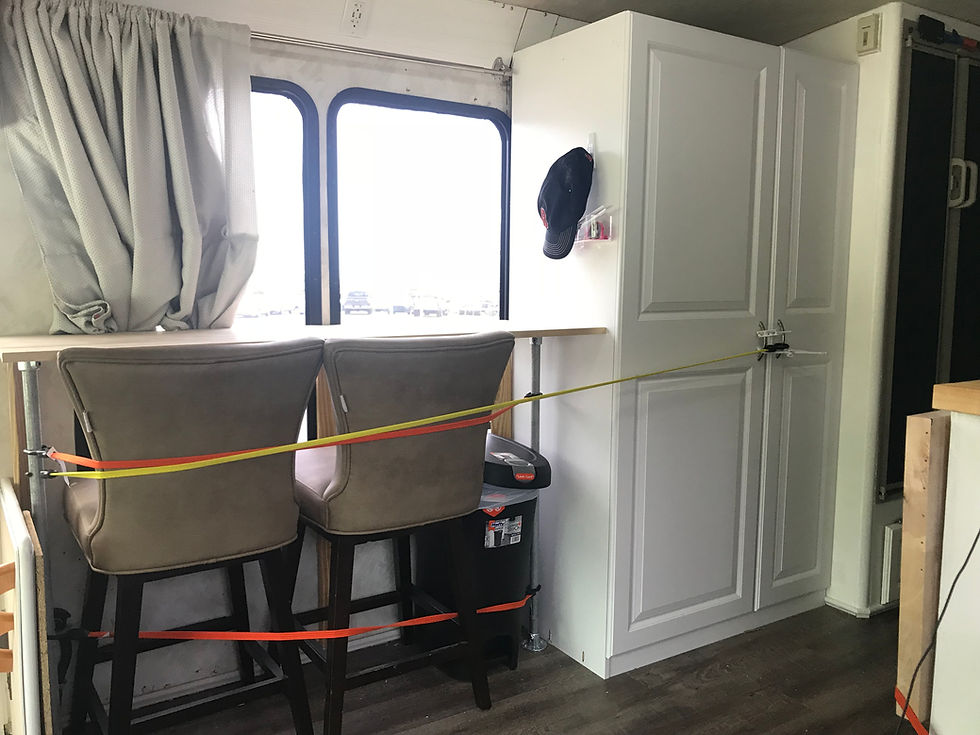
With the bed done, we were quickly coming up to the finish line of the main cabin. We still had a pantry, table, and couch to get in the rig. What proved to be the nightmare though, was the couch. I actually think Ikea directions would have made it less infuriating. Or would it?


Comments